Managing Adobe Campaign Packages via the Command Line
Published on by Dan Klco
Adobe Campaign includes a command line interface by which administrators and developers can interact with the system via a command line interface, instead of the graphical user interface. Included in this command line interface is a tool for importing and exporting packages directly through the command line. This allows teams and users to more easily share and deploy configurations and content between Adobe Campaign instances.
To manage packages using the Adobe Campaign command line interface, perform the following:
Step 1: Create Package
To manage packages in Adobe Campaign through the command line interface, first you will need to create the package from within Adobe Campaign.
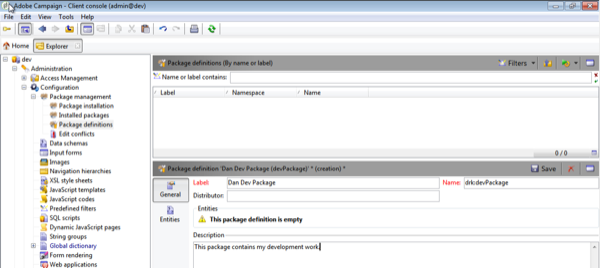
Once you have created the package and defined its contents, copy the package name. We'll use this in the next step.
Step 2: Export Package
Next, login to the Adobe Campaign Server and execute one of the following command:
nlserver package -instance:[instance_name] -export:[target_file] -spec:[package_name] -verboseThe parameters are:
- instance_name: the name of the instance, as defined in the config-[instance_name].xml in Adobe Campaign's conf directory
- target_file: the file to write the package contents to, does not have to exist
- package_name: the name of the package you defined in step 1
I've also added the verbose flag to get more verbose output in the case of errors or warnings.
An example of this command and its output is below:
C:\Adobe\Adobe Campaign Server v6\bin>nlserver package -instance:dev -export:C:\Users\bootcamp\Desktop\package.xml -spec:drk:devPackage -verbose
23:39:56 > Application server for Adobe Campaign Version 6.1.1 (build 8667) of 08/04/2015
23:39:56 > Loading configuration for instance 'dev'
23:39:56 > Starting 1 connection(s) on pool 'default dev' (PostgreSQL, server='localhost', login='dev:dev')
23:39:56 > Library 'libpq.dll' loaded from 'C:\Adobe\Adobe Campaign Server v6\bin\libpq.dll'
23:39:56 > Exporting package 'drk:devPackage'...

C:\Adobe\Adobe Campaign Server v6\bin>
Step 3: Import Package
Once the package is exported it can be shared modified or distributed as needed. To re-import the package into the same or a different instance, execute the command:
nlserver package -instance:[instance_name] -import:[target_file] -verboseThe parameters are:
- instance_name: same as export, this is the name of the instance, as defined in the config-[instance_name].xml in Adobe Campaign's conf directory
- target_file: the file to write read the package content from, must exist and be a valid package file
An example of this command and its output is below:
C:\Adobe\Adobe Campaign Server v6\conf>nlserver package -instance:dev -import:C:\Users\bootcamp\desktop\package.xml -verbose
00:04:49 > Application server for Adobe Campaign Version 6.1.1 (build 8667) of 08/04/2015
00:04:49 > Loading configuration for instance 'dev'
00:04:49 > Starting 1 connection(s) on pool 'default dev' (PostgreSQL, server='localhost', login='dev:dev')
00:04:49 > Library 'libpq.dll' loaded from 'C:\Adobe\Adobe Campaign Server v6\bin\libpq.dll'
00:04:49 > Importing package 'C:\Users\bootcamp\desktop\package.xml'...
00:04:50 > Enumerating the file entities...
00:04:50 > Writing entities in the database...
00:04:50 > Saving data related to packages...
00:04:50 > Package 'Dan Dev Package': Saving entities of type 'nms:recipient'...
00:04:50 > Package 'Dan Dev Package': Saving entities of type 'xtk:specFile'...
00:04:50 > Installation of packages successful.
Hopefully this helps anyone wanting to know more about using Adobe Campaign's powerful command line interface and to improve their process by more easily sharing and distributing content and configurations for Adobe Campaign.